
Our Team’s Top Outdoor Cannabis Harvesting Tips for Croptober!
November 2, 2021
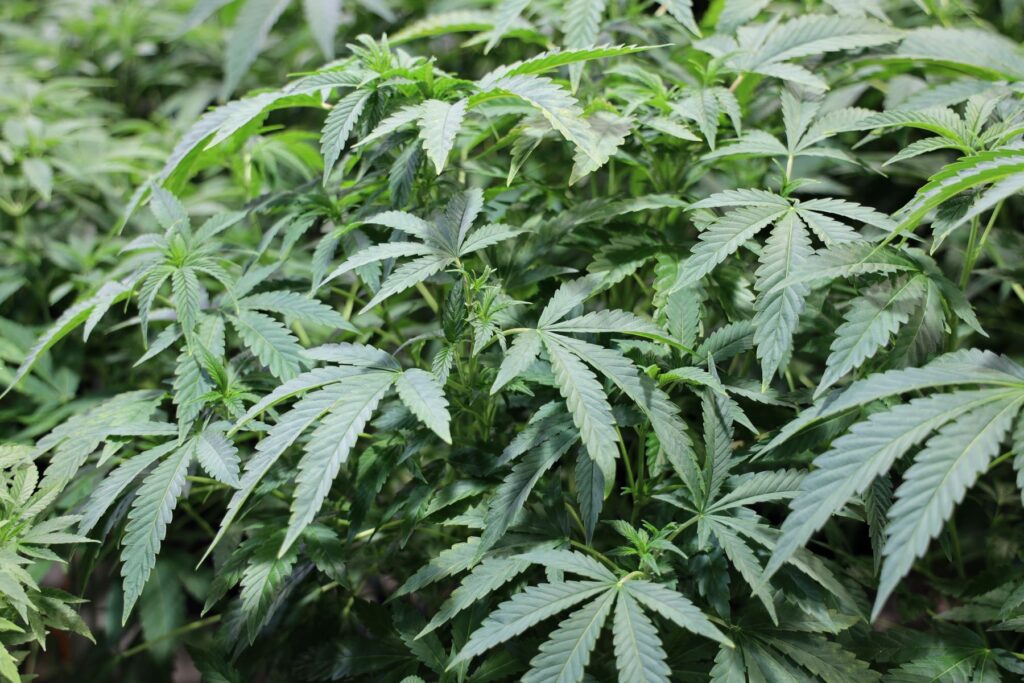
Growing cannabis plants outdoors is the easy part – the real work begins at harvest!
As one member of our team recently noted:
“When you’re doing outdoor, growing big plants is the easy part. The hard part comes when it’s time to harvest, dry, trim, cure, and store all those buds you grew.”
We have good news for those who’ve been successful in growing big, beautiful, bud-filled outdoor plants but aren’t sure what to do with them now that it’s “Croptober.”
We went to our team and asked them to share their best tips for the outdoor harvest season.
Living up to GreenSeal’s motto – “For the Greener Good” – the team has generously offered up a treasure trove of invaluable advice for those who are looking for guidance during the critical final steps in the overall outdoor cannabis growing process.
We hope everyone’s outdoor harvests this year are bountiful and smooth.
We also hope these tips can help new growers (or even some seasoned cultivators!) maximize the quality and quantity of their harvest so they can experience the fruits of their summer’s labour all year ‘round.
If you’ve got a specific problem and don’t find the answer here or in the previous post, please leave a comment at the end of this post and our team will do its best to steer you towards a solution.
Security: You can’t harvest stolen plants
Unfortunately, the popularity of legal home growing has resulted in a huge spike in thefts during harvest season.
As you get closer to your harvest and your plants start getting heavier and heavier with flowers, your risk for getting your plants robbed also increases.
Put your mind at ease by investing in a live-streaming video camera. You can get an affordable outdoor security camera with a motion detector, warning spotlight, and a siren from Amazon.
It streams video straight to your phone and alerts you whenever the motion detector is tripped.
There’s even two-way talk so you can personally tell would-be thieves you’re watching them and let them know the police have been called.

The Vital Last Steps: Trellising, Flushing, and Removing Mould & Mildew
Trellising: Give your plants the support they need. When you’re growing massive, top-heavy outdoor plants, it’s important to give them support.
Stake your plants early (ideally before they start to flower in early August), then install your first hard trellis (made of metal mesh) shortly thereafter.
As your tops start to grow up beyond the first trellis, you’ll need to add at least one more soft plastic trellis above the metal trellis to stop them from snapping or flopping over.
Buds that are vertical (straight up and down) get less mould, mildew, and “bud-rot” because there is better airflow. They also mature evenly since the entire flower gets the same amount of light.
Give your potted plants a flush. If you are growing in pots, you’re going to want to start flushing the residual fertilizer salts from your plants by watering with just plain water over the last two weeks before harvest.
“Sweat” your flowers if you grew in soil. If you’re growing directly in soil, you can’t really flush your plants, but you can “sweat” out residual salts during the curing phase.
Trim and dry your flowers to 18% moisture (they will still be slightly spongy to the touch and the stalks will bend rather than snap).
Put them in a bag for 4-6 hours, then dump them out and let the moisture and fertilizer salts that have been pulled out evaporate. Repeat until the flowers are suitably dry.
When the flowers are combusted, the ash will be nice and white, not black (which, along with harsh taste, is a sign of too much residual nitrogen).
Avoid mould and mildew with a tarp. After getting this far with your crop, it would be a shame to let your plants get ruined by mould or powdery mildew.
These problems are usually caused by excessive moisture getting into dense buds; one way to prevent this is to put a clear tarp over your plants when it’s going to rain (or at night to stop dew from falling on them).
Got mould? Cut it out! If you start to see spots and patches of mould or bud rot on your plants, you don’t need to cut the whole plant down, you just need to cut out the problem areas before it spreads to the whole plant.
Mould will spread via spores, so you need to immobilize the spores first by spraying water on the affected areas.
Cut out the mould and then throw it out – don’t even use it for extracts or edibles, it’s no good for anything at this point.
A no-spray solution to powdery mildew. Prior to your plants’ flowering, you can deal with powdery mildew by spraying it with a mixture of baking soda, vegetable oil, and dish soap.
But you should never spray your plants with anything after mid-August, or the residue will remain in your flowers.
If you get mildew during the final weeks of cultivation, the best thing to do is to wait for it to rain so the plant is wet, then remove the leaves manually.
It’s also a good idea to check your garden for other non-cannabis plants that could be spreading powdery mildew – get rid of them before it hits your crop!
Harvest Timing: Your patience will be rewarded
Know your strain’s flowering period. Most strains are expected to take 8 to 10 weeks to fully flower.
The majority of strains will start budding in mid-August (by the time you start to notice buds setting it’s likely the plant has been in its flowering stage for two weeks already).
You need to let the plant complete its natural flowering cycle to allow for the calyxes to fill up with resin. The final buds should be round and dense, not airy.
Red hairs = ready. When you’re harvesting, wait for at least 70% of the buds’ hairs to change from white to red for maximum cannabinoid levels.
A light frost will bring out fall colours. If you can leave your plants out long enough to experience a light frost it can actually be beneficial.
Frost can bring out the purple shades in some cannabis strains – it’s not just trees that change colour in the fall! Just remember, while a light frost (a couple of degrees below freezing) can be good, a hard frost is a crop killer.
Zoom in on trichomes to know for sure. If you want to really take out the guesswork, get a macro lens for your smartphone’s camera.
Once you zoom in, you’ll be able to monitor the development of the tiny, mushroom shaped, cannabinoid-filled trichomes on your flowers.
They will first appear clear, and eventually start turning cloudy or milky.
The ideal timing for harvest is the moment these milky trichomes start to turn amber in colour.
Harvest in stages. Typically, the top third of most plants get more light than the bottom two thirds, which means it matures faster.
If the big colas at the top of your plants look like they’re done but the rest haven’t reached full maturity, harvest the tops first and let the undergrowth continue to grow until just before the season-ending hard frost hits.
Harvesting in multiple stages is particularly useful for Sativa-dominant strains, which often have longer and later flowering periods than Indica strains.
Use smaller buds for edibles and extracts. The little “popcorn” buds you find in the lower part of your plants are ideal for turning into cannabutter or concentrates.
Harvesting: Reap what you’ve sown
Chop don’t pull. When it’s time to take your plants down, chop them off cleanly at the stem.
Don’t pull the root ball out – you want the plant to die at this point, not stay alive!
Also, if you hang a plant upside down with the roots still intact, you’re likely to get soil on your buds.
Hang branches, not plants. There is no benefit to hanging an entire plant upside down. It’s much easier to manage if you cut the individual branches from the plants and hang those.
Drying: Control is the key
Dry for a week minimum. You should expect to dry your plants for 7 to 10 days to achieve the proper moisture level before putting them into buckets or jars for final cure [see below for curing tips].
Your drying space is probably going to stink up the whole house. If you’re drying in a house (or in a unit within a larger building), be aware that the smell of drying cannabis will likely permeate beyond the room you’re using for drying.
You might want to warn your neighbours if you live in a multi-unit residence (so they don’t call in an exterminator for a non-existent skunk problem!).
Light is the enemy of THC. Keep the lights off as much as possible in your drying space. THC degrades into the non-psychoactive cannabinoid CBN when it is exposed to light. If you’ve got a window you should cover it to stop the light from entering.
Don’t dry in your shed. The product will get musty because it’s very hard to control the environment and drying conditions in an uninsulated outbuilding.
Got a spare bathroom? If you have more than one bathroom you should consider turning one into a temporary drying space.
The bathroom can give you control over humidity and temperature. Get a humidity/temperature monitor and do your best to keep the room at 17-20°C and 50-55% humidity.
You can turn on the AC if you need to adjust the temperature.
If it’s too dry, you can fill the sink with water overnight; if it’s too humid (or smelly!) you can open a window or turn on the vent fan (or you can usually get a cheap dehumidifier off Kijiji for under $50).
Use the shower curtain rod with coat hangers to hang your plants upside down.
All the dead leaves will fall into the tub (which makes for easy clean-up!).
Low & slow, that is the temp-o. Lower temperatures when drying means it takes longer for your harvest to achieve the dryness you need. That’s a good thing – the longer you take the better the flavour will be.
Fans are key but you need to use them properly. It seems logical (and tempting) to just blast your hanging crop with fans to dry them out quickly.
Unfortunately, fast-moving air will blow off the trichomes, make the product dry too quickly, and degrade the THC.
Put a dehumidifier along with a few fans into your drying space, but make sure the fans aren’t pointed straight at your plants. Indirect movement of air will promote the kind of gentle airflow that will dry (but not damage) the plants.
Give your drying plants some space. If you pack them in too tight there won’t be adequate air movement to dry your harvest. Leave 3 feet between drying lines to ensure proper airflow.
Trimming: Truly a labour of love
Be prepared to spend some time. Hand trimming properly should take 12-15 hours per pound of dried cannabis, so give yourself lots of time for this important task.
The right tools make all the difference. If you’re trimming by hand you should invest in a couple of inexpensive items that will make your life much easier.
First, get yourself a box of disposable nitrile/latex gloves to avoid getting stinky, sticky resin all over your hands (and don’t worry, you can pull the “finger hash” resin off the gloves just as easily as your fingers).
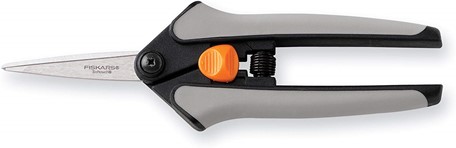
Second, buy yourself and your trim-mates some quality ergonomic scissors. Your hands will thank you!
These scissors by Fiskars are spring-loaded (and are even endorsed by the Arthritis Society!).
There are some advantages to dry trimming. It’s more work, but dry trimming (trimming after the product has been hang-dried) can result in a better finished product, including nicer appearance, better smell, and a higher quality smoking experience.
Wet trimming works great too. Getting rid of all the fan leaves and other non-flower leaves immediately after harvest helps with air movement and avoids any THC loss when you dry trim brittle, dehydrated trichomes.
Save your best plants for dry trim and wet trim the rest. Trimming is usually a huge task, so it doesn’t make sense to sit and wait for all your plants to dry before you get started.
Get going with wet trimming right away and continue to work your way through your hanging plants.
Save the absolute best for the end and let them dry completely; leaving the leaves on while they dry will protect the cannabinoid crystals from exposure to light and air and will help the plant dry evenly.
Final Cure: Given time, your buds will improve
Curing is an often neglected but super-important step in the harvest process. Putting the dried flowers into airtight containers that are regularly opened causes them to convert their starches into sugars, which can be the difference between harsh tasting flowers and bud that tastes nice n’ smooth.
Choose the right containers. If you need to cure larger quantities, you can use opaque buckets with screw-top or sealable lids.
For smaller harvests, nothing beats Mason jars (just make sure to store them somewhere cool & dark).
“Burp” your containers daily. Open & dump out your buckets or jars every day over the course of 2 weeks for 30 minutes to an hour in order to release any gasses collecting in the containers.
Here’s how to test if your product is ready. Take a bud and bend it in half. If you hear and feel the inner stem crack (but not break), it is perfect.
If the inner stem bends but doesn’t crack at all, then the flower is still too wet; if the whole bud breaks clean in half it’s too dry.
The flower itself should feel slightly squishy but shouldn’t turn to powder when you pinch it.
Storing & Processing:
Don’t let your THC degrade into CBN! Exposure to air, light, and heat will cause the THC in your crop to transform over time into a completely different, non-psychoactive cannabinoid called CBN.
For this reason, you need to make sure the flowers you harvest are stored in a dark, cool place in airtight containers.
Store in a fridge, not a freezer. Freezing your crop turns the trichomes on the buds brittle – which would be great if you were trying to remove and collect them to create bubble hash, but not good if you’d like them to stay on the buds.
If you do freeze or refrigerate your flowers don’t handle them when they’re cold.
For long-term storage, consider DIY concentrates. Turn your flower and trim into concentrates or extracts to drastically cut down on the need for long-term storage space.
Go solvent-free for quality (and safety!). The days of people blowing up their garage while trying to make DIY hash oil extracts using butane (or another hydrocarbon solvent like propane) are over!
These days it’s all about the solvent-free extracts – get yourself a rosin press and use heat and pressure to safely extract the cannabinoids and terpenes from your harvest.
In addition to taking up much less space and being easier to store, nothing beats the taste and quality of rosin in dabs or wax pens.
Harvest like the pros!
There you go – now you have all of the GreenSeal team’s best tips for a successful harvest.
For those who grew for the very first time, we hope it was a positive experience and you learned a lot.
Because if there’s one thing that’s common among all gardeners, it’s the conviction that next season will always be better!
If you’ve really caught the cannabis cultivation bug, keep an eye out on our website and social media for future posts offering guidance on indoor cultivation for beginners.
Do you have a harvest question we didn’t cover here?
Or another pro tip to share to help newbies maximize their harvest?
We’d love to hear them, let us know in the comments below!
Considerably, the article is really the finest on this worthwhile topic. I do agree with all of the concepts you have presented on your post. We provide cannabis equipment financing services. Visit us: https://www.heffinance.com/cannabis-finance.php
We are getting ready to pull r girls from outside to harvest I am not sure to flush out or not we have used chemicals all along but we have stopped with chemicals but I am still not sure if we should flush with water only or not water.. do not want the girls to stress out. Please explain a little further. Thanks. Also I. The future there is suppose to be some kind of a crystal I can put in the water to avoid getting mold. Haven’t got it but not much rain this year.
Hi Viv, thanks for your question. sounds like you’ve been doing great so far. Ideally you should stop feeding flowering nutrients a couple of weeks before you harvest, substituting with straight water (once a week or as needed if you’re growing in pots). This will ensure any remaining nitrogen will be flushed out, which will promote smooth flavour and consistent burning (evidenced by white ash at the end of your joints). It shouldn’t stress the plants at all. We aren’t familiar with additives to water designed to inhibit mold, the best techniques we know are to create lots of airflow around the plants (e.g. by making sure there’s plenty of space between the plants and debranching the bottom third) and to keep a close eye and cut out any mold as soon as it appears so it doesn’t spread to the rest of the plant. Happy harvesting!!
How far apart should I plant my plants
Hey Don,
Our recommendation is to plant them at least 6 feet apart from each other. Good luck with your grow!
Thanks for reaching out Herchelle!
You could decarb the leaves (30 minutes at 240F in the oven) and then put them in a slow cooker with butter or coconut oil for several hours to make an infused cannabutter or oil, but it wouldn’t be very strong since those fan leaves typically don’t have a lot of trichomes.
Best to either add the fan leaves to a larger batch with proper sugar leaves left over after buds are trimmed (so-called because they’re frosty with trichomes), or just feed them to your bunnies!